Guides
This user guide is designed to get you sending and receiving faxes from within the Zoom desktop client quickly and easily. Please note your Zoom Admin or IT personnel will have to enable Marketplace Apps and approve the FaxSIPit Fax App for your organization before you can install it. Once installed there are four main areas on the dashboard. We’ll go through the install process first then then discuss the dashboard and its options.
Install the App
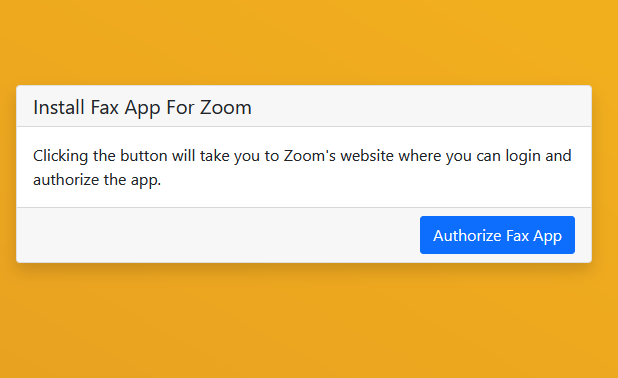
The FaxSIPit Fax APP for Zoom can be installed from the Zoom Marketplace. The installation URL is here.
Using the above URL please install the FaxSIPit Fax App following the steps below. You must be logged into your Zoom account to install the app. To begin the install process, please click this button: 
Steps
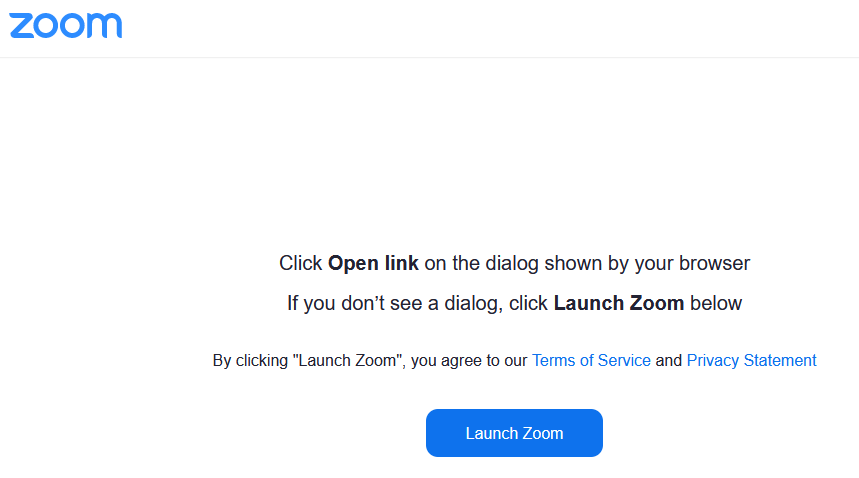
- After you click the “Visit Site to Install” button you will be presented this screen. Please click “Authorize Fax App”
- From this screen please check “Allow this app to used my shared permissions” then click “Authorize

- Upon completion of the install you will be redirected to a typical Zoom meeting page
The install is now completed. The App may automatically open but if not you can return to the Zoom App and select “Apps” from the top menu. This will display the My Apps list of installed apps. To use the “FaxSIPI Fax App from Zoom” app click “Open” beside it.

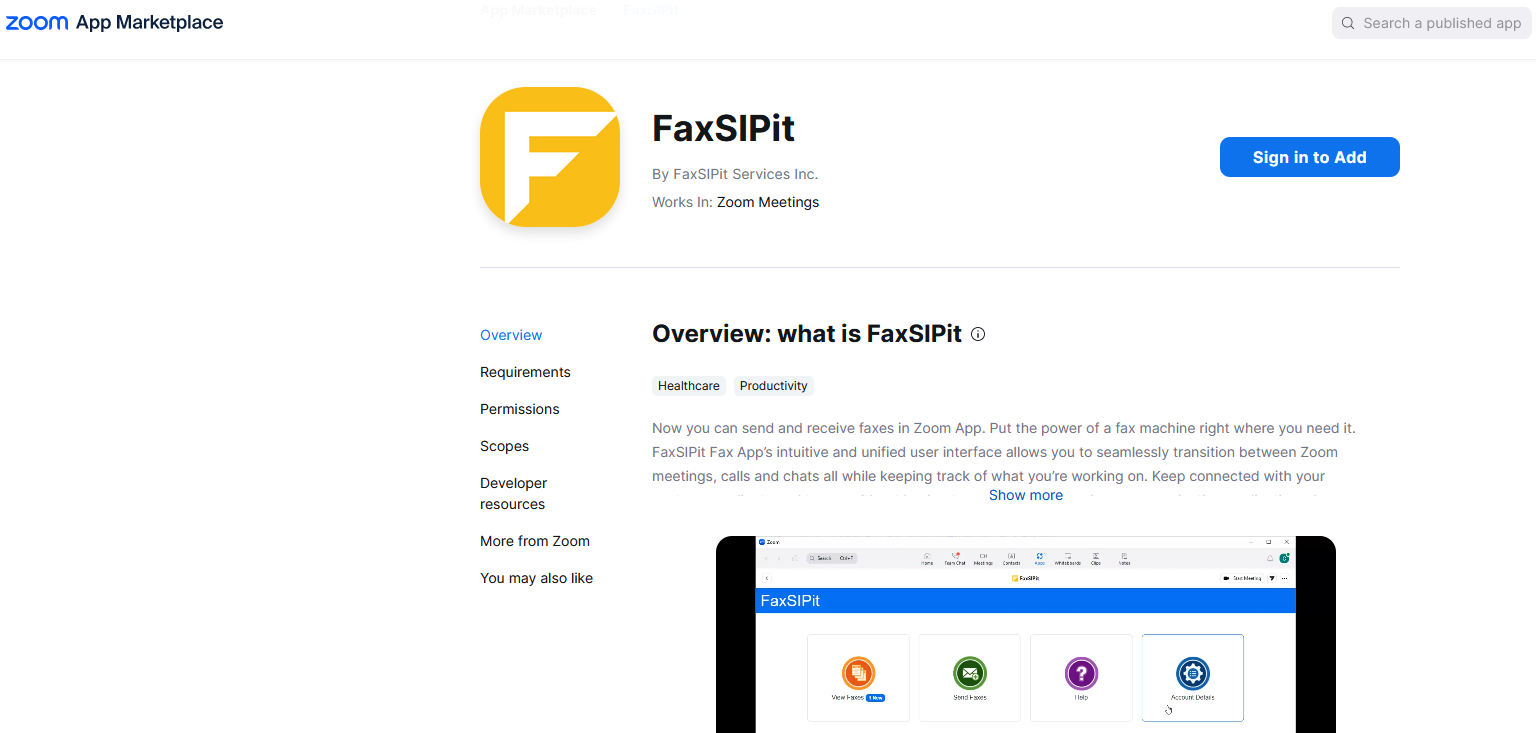
Dashboard
When you click “Open” from the Zoom Apps page you will see the following dashboard:

- View Faxes – List of Received and Sent faxes are available here along with a download option
- Send Faxes – Faxes can be sent from this option
- Help – How To and FAQs
- Account Details – User’s fax number and email address
View faxes
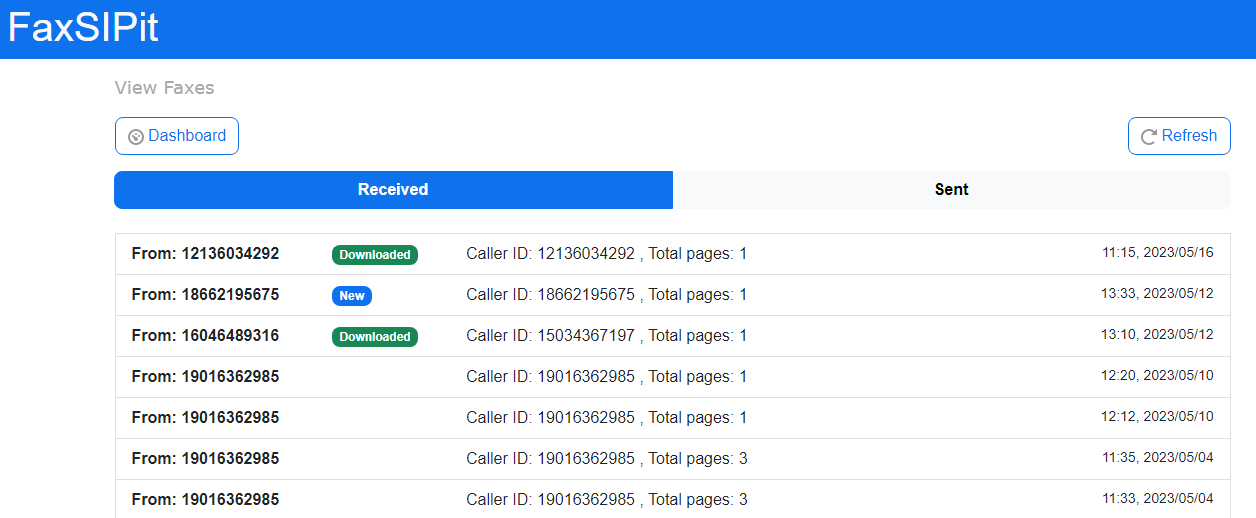
You can access your sent or received faxes by clicking the “View Faxes” button on the dashboard. Here you have two options “Received” or “Sent” and can choose either to see the corresponding fax:
View a received fax
For Sent and Received faxes you will see a list of faxes and some details for each fax. Each fax displays the following:

- From: This shows to sender’s fax number
- Status: Will display a New or Downloaded for Received faxes only
- CallerID (if available): Along with destination number and Page count.
- Date/Time: The date and time of when the fax was received (based on your local computer time zone)
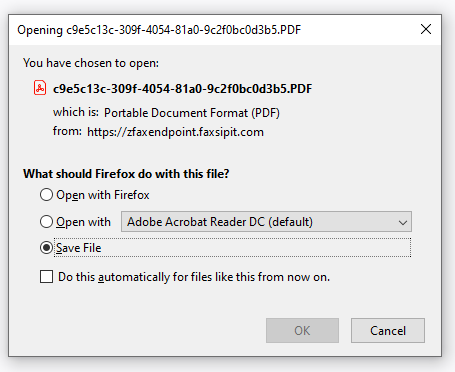
You can click on the fax entry to view or download the fax message:
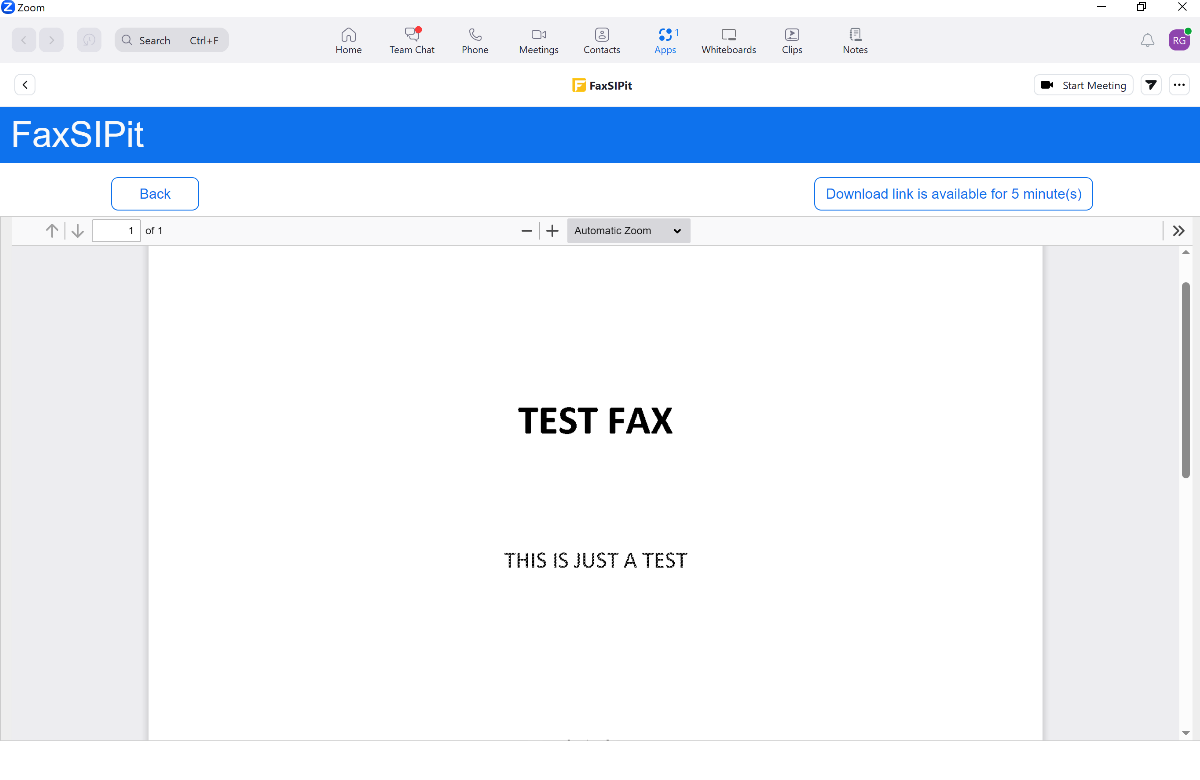
Once you’ve read it the Status changes to blank. If you choose to download the fax then the status in the list area will show “Downloaded”. When viewing a received fax message you can click the download link. When you download a fax to your local computer you can sign it or otherwise update it and then send it back to the recipient. Click the button and choose an action from the dialogue box:
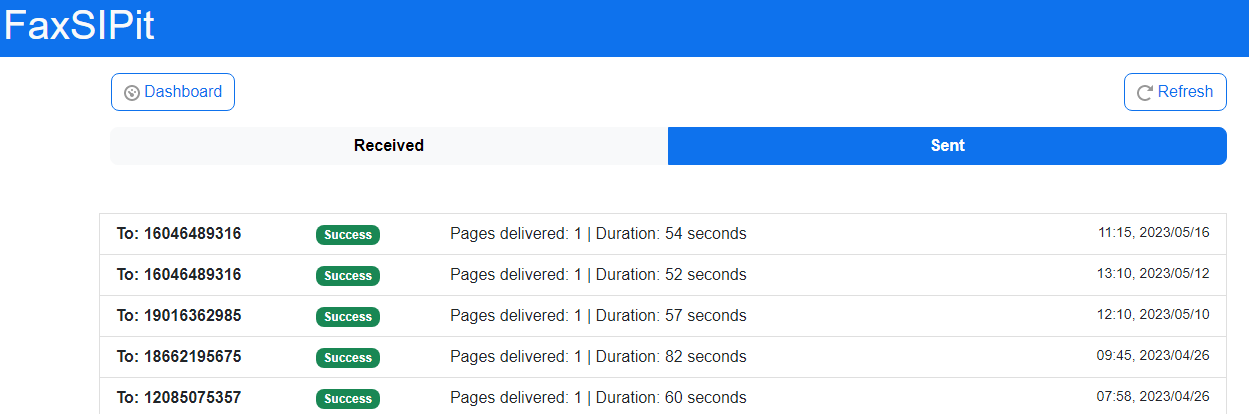
Understanding the status of a SENT fax
Sent faxes are displayed with summary information like destination number and page counts etc. The status of the fax tells you whether your fax was successfully sent or not. In the list you will see:
- Successful: A green “success” icon, which indicates that the fax has been delivered to the recipient
- Failed: A red “failed” icon indicates that the fax wasn’t sent due to technical issues including wrong Number”, missing country code, busy etc.
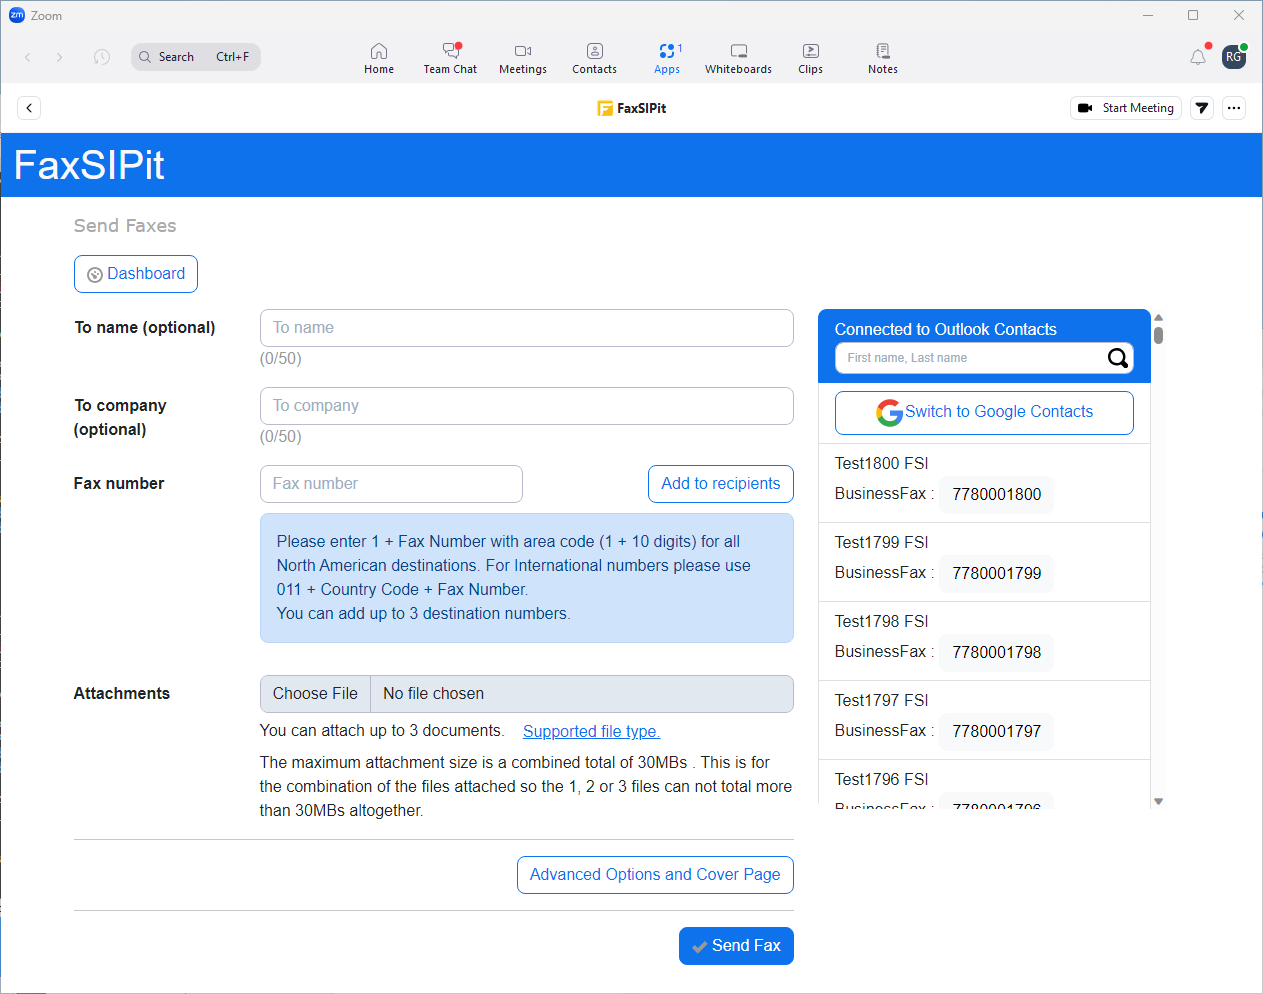
Send faxes
This where you will send a fax, attach files and choose a recipient. You can also sign into Outlook to retrieve contacts that have fax numbers. There is a search function as well as Advanced Options.
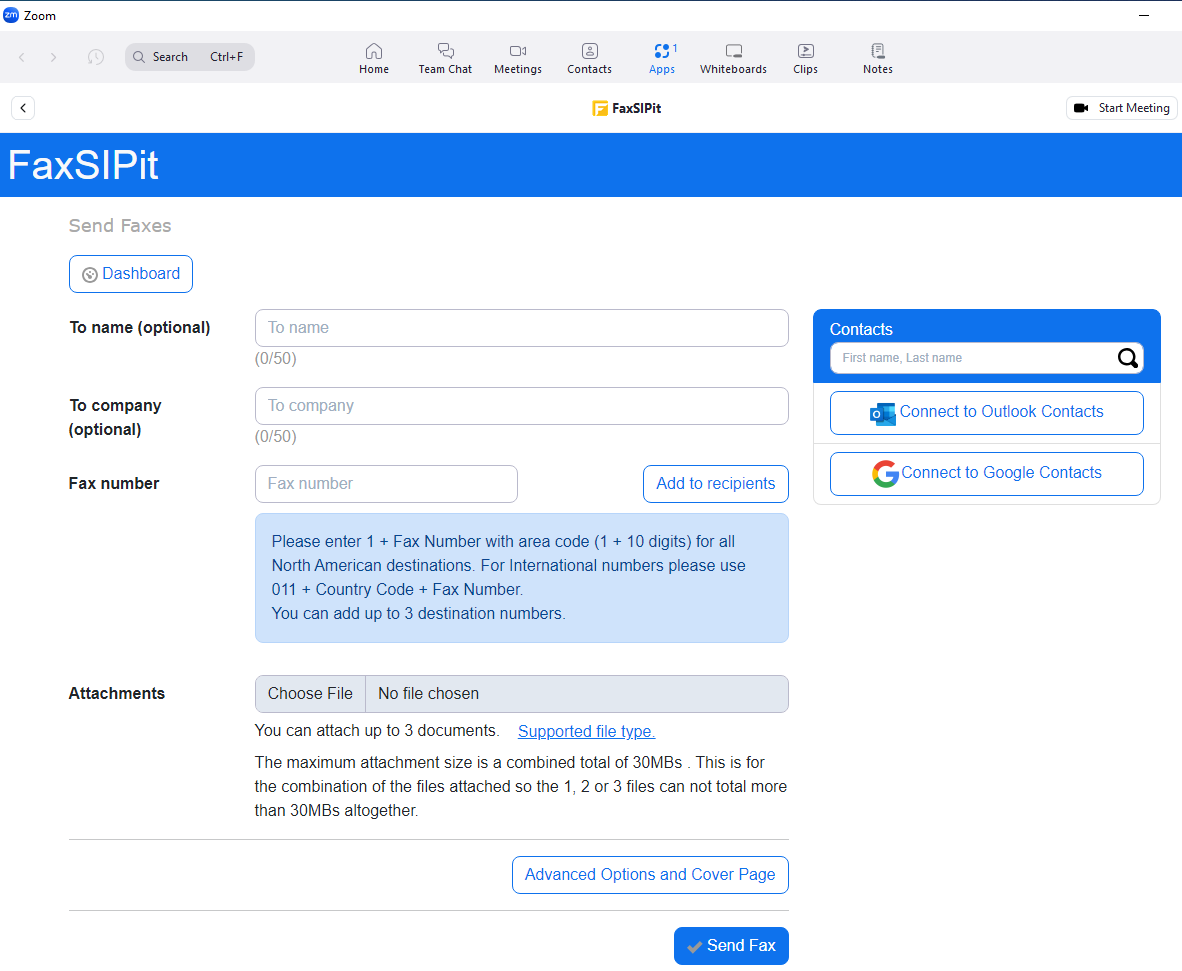
Here are the instructions for sending a fax:
- Tap the green “Send Faxes” icon in the upper right of the main dashboard.
- You can enter a Name and/or Company but both are optional and not required to send a fax.
- Enter the number of the fax recipient in the “Dial Number” field. You can add up to 3 recipients.
Please see the Working with Recipients and Outlook Contacts below - Select the “Choose File” button and select the file or files you’d like to fax.
You can add up to three (3) files with a combined maximum total size of 30MBs. - In the “Advanced Fax Options” you may select the image quality or add a Cover Page.
Both choices are optional. However, a default image quality is already set. Details added to the Cover Page (e.g. name, subject or note) will be sent along with your attached file. - When ready click “Send Fax”
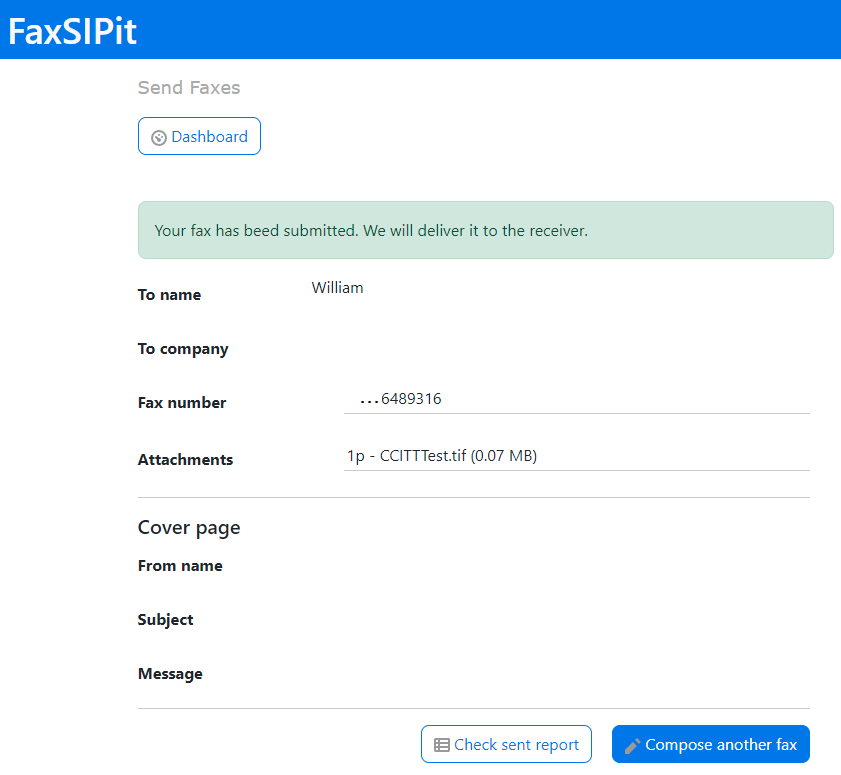
Once you’ve sent a fax, the app will display this screen. You can choose to view the status of the sent fax in the View Faxes section. Or send another fax:
Working with recipients and Outlook and Google contacts
As mentioned in Step 3 of sending a fax you can add more than one fax number by clicking the “Add to recipients” button:

There is a choice of Google or the Outlook Sign In buttons:
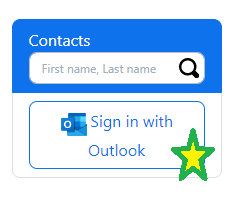
You can choose this option to access your Outlook/Google Contacts and select a fax recipient from there.
This is a sample list of contacts:

Help
This section contains helpful details, how to instructions and frequently asked questions.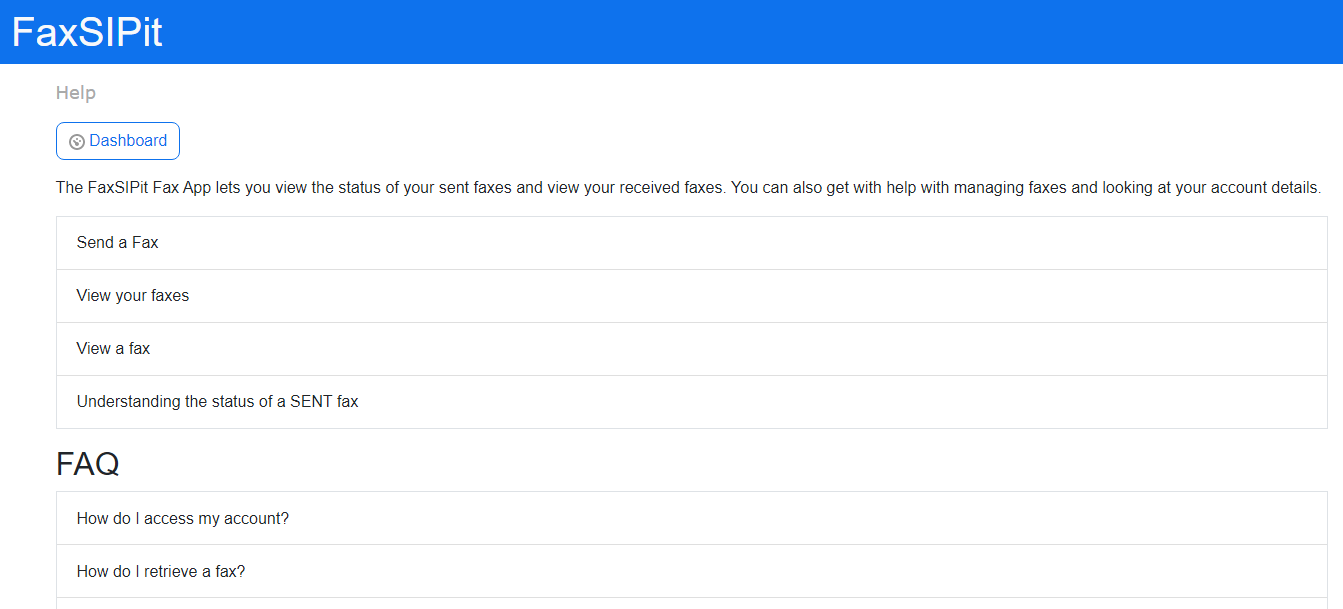
Account Details
Here you can get your account information like fax number and email address.

Receive New Fax Notification feature allows you to see that a new fax has come in when using other Zoom client services.
Disclaimer: Due to account access rights we cannot guarantee you will get a notification for all new faxes.
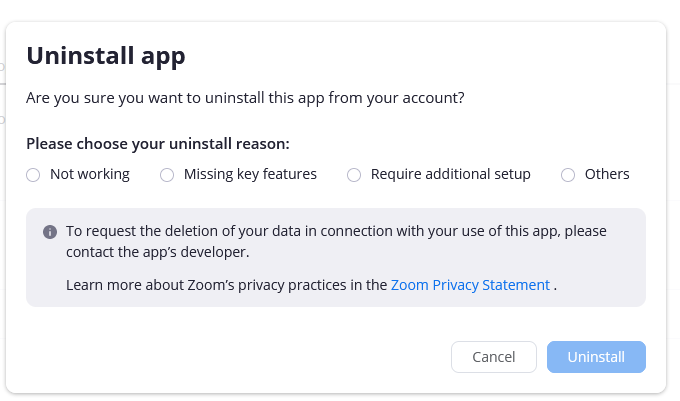
Uninstall FaxSIPit Fax App for Zoom
You can uninstall the app by performing the following steps. Login into the your Zoom account and got to the Zoom Marketplace. From there select “Installed Apps” on the left side menu. You will see a list of installed apps, please click “uninstall” button beside the FaxSIPit app:

One the next screen please choose the uninstall reason and then click the “Uninstall” button. This will remove the app from your Zoom Desktop. Please note this will not affect your fax account with FaxSIPit. You will have to contact them if you want to cancel your services.
FAQ
Glossary
- Contact Email Address
- Your primary contact email address is used to send your important service related notices. Changes to this field do not affect the email address from which you send or receive faxes. Please update your send and receive email addresses in the "Preferences" section under the "Send" and "Receive" options.
- Receive Email Address(es)
- The receive email address(es) is the address(es) where you want to receive the inbound fax transmissions that are sent to your eFax number.
- Send Email Address(es)
- The send email address(es) is the address(es) that are authorized to send fax transmissions from your eFax number.
Company Profile
FaxSIPit Services Inc. is a secure messaging and collaboration fax provider for the VoIP market. We are a privately held company located in Vancouver, British Columbia and have operation centers in Canada, the US and South Africa. FaxSIPit has been involved in analog, digital and IP Fax only (Fax-over-IP) development and service delivery for over thirty years.
Starting in 2004, and over the next five years, FaxSIPit along with its partners developed, tested and patented a new method of IP Fax delivery utilizing HTTPS. This effort resulted in the patented application built into our HTTPS FAX ATA. This device addressed a serious need to improve faxing quality and reliability over the Internet while working with existing fax machines and servers.
In early 2010 FaxSIPit opened its SecureFax Cloud Service, which offered the patented HTTPS ATA device. Since its release and introduction HTTPS/TLS has proven it is the standard for reliable and secure Fax-over-IP delivery. It has been widely adopted by the marketplace for its ease of use, regulatory compliance and consistent performance having received rave reviews and critical acclaim.
In 2016 we launched the smaller inexpensive FaxSIPit SecureFax-ATA that also eliminated costly telephony infrastructure and improved fax service. We continue to innovate and improve faxing along with secure document collaboration services for the future.
We have designed our network infrastructure to mitigate the myriad of technical failures that can impact service delivery and operations. Most other fax services do not provide the necessary privacy, security and administrative capabilities or forensic analysis tools to support the strictest regulatory mandates. Our fax technology is designed to comply with financial security and privacy regulations like the Sarbanes-Oxley Act (SOX) and the Gramm-Leach-Bliley Act (GLBA). Additionally we are PCI-DSS and HIPAA (BAA) compliant. We can provide a full list of compliances upon request.
We have a dedicated LNP department to help you port an existing number from another carrier to FaxSIPit. The porting process takes anywhere between 3-10 business days. Once a firm date is received, the LNP team will notify you of the FOC (firm order confirmation) date.
Contact information
FaxSIPit Services Inc.
General Inquiries and Billing etc.: customerservice@faxsipit.com
Technical Support and Setup Inquiries: support@faxsipit.com